HOW TO INSTALL LIGHTROOM MOBILE PRESETS
Thinking of buying our Lightroom Mobile Presets but aren’t sure where to start? We’ve got your back!
Below is a tutorial that will take you through the whole Lightroom mobile preset installation process.
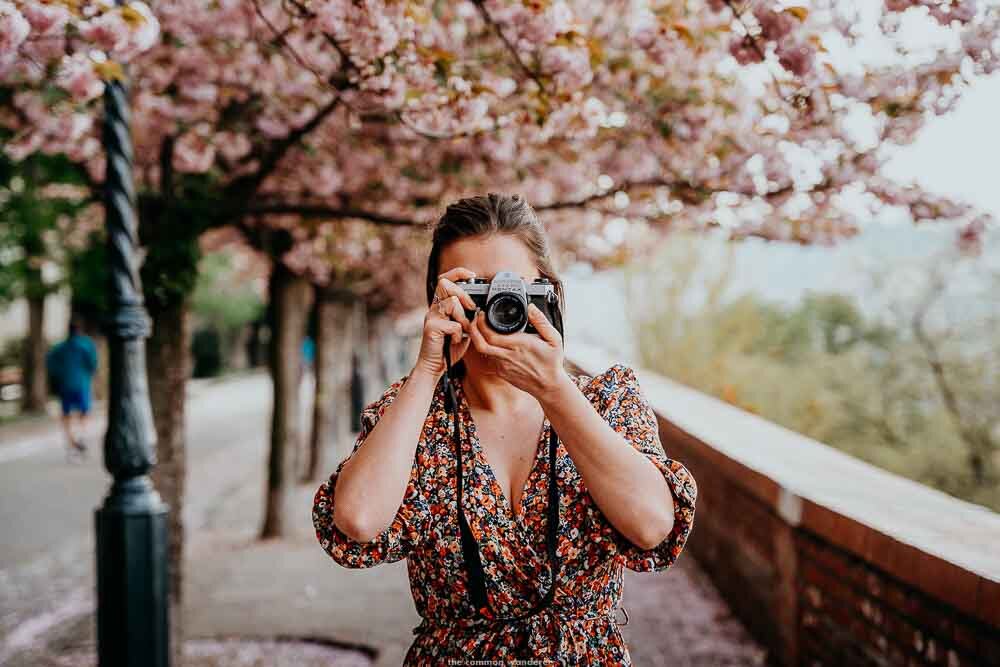
This will allow you to save each preset and apply them with one click, helping those travel snaps of yours become amazing!
If you want to download our Lightroom Mobile presets straight to your phone and use them on the free app without going through the desktop version, you can do it directly on your phone using the method below.
If you already have the desktop version of Lightroom, you can simply sync your presets between Lightroom Desktop and Mobile (sign up to Adobe Creative Cloud here).
If you haven’t yet, grab your set of our custom Desktop and Mobile presets here.
HOW TO INSTALL LIGHTROOM MOBILE PRESETS
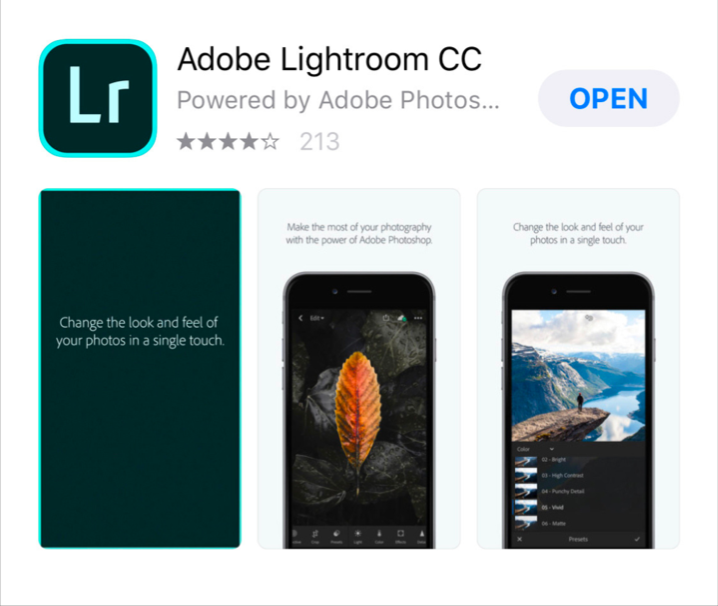
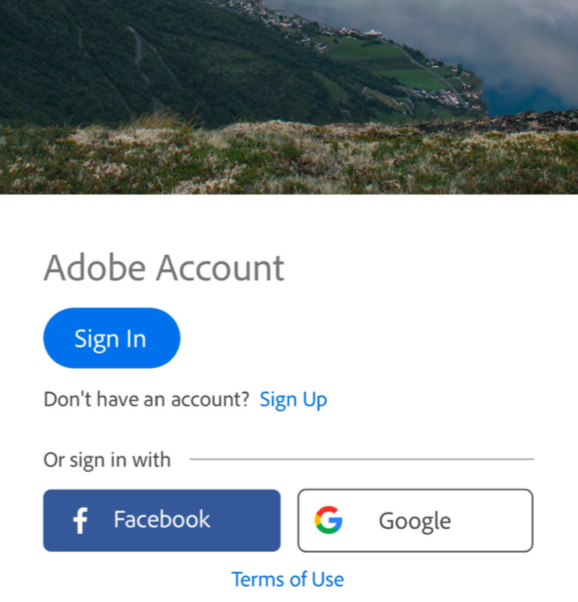
STEP #1 | DOWNLOAD ADOBE LIGHTROOM CC APP
To start off, download the free Adobe Lightroom CC App from your mobile App Store.
Once downloaded, if you haven't already, you will then need to create an Adobe account. This is quick and free to do.
STEP #2 | DOWNLOAD THE DNG FILES TO YOUR PHONE
The Common Wanderer mobile presets will come as DNG files which you can download directly to your phone.
We find it easiest to unzip your presets on a desktop computer and send them to your phone. We tend to do this via AirDrop, email or Google Drive.
AirDrop is typically the quick and easiest method for file sharing. As the files are in DNG format, they will show up on your camera roll as blank photos. Don't worry, this is normal.
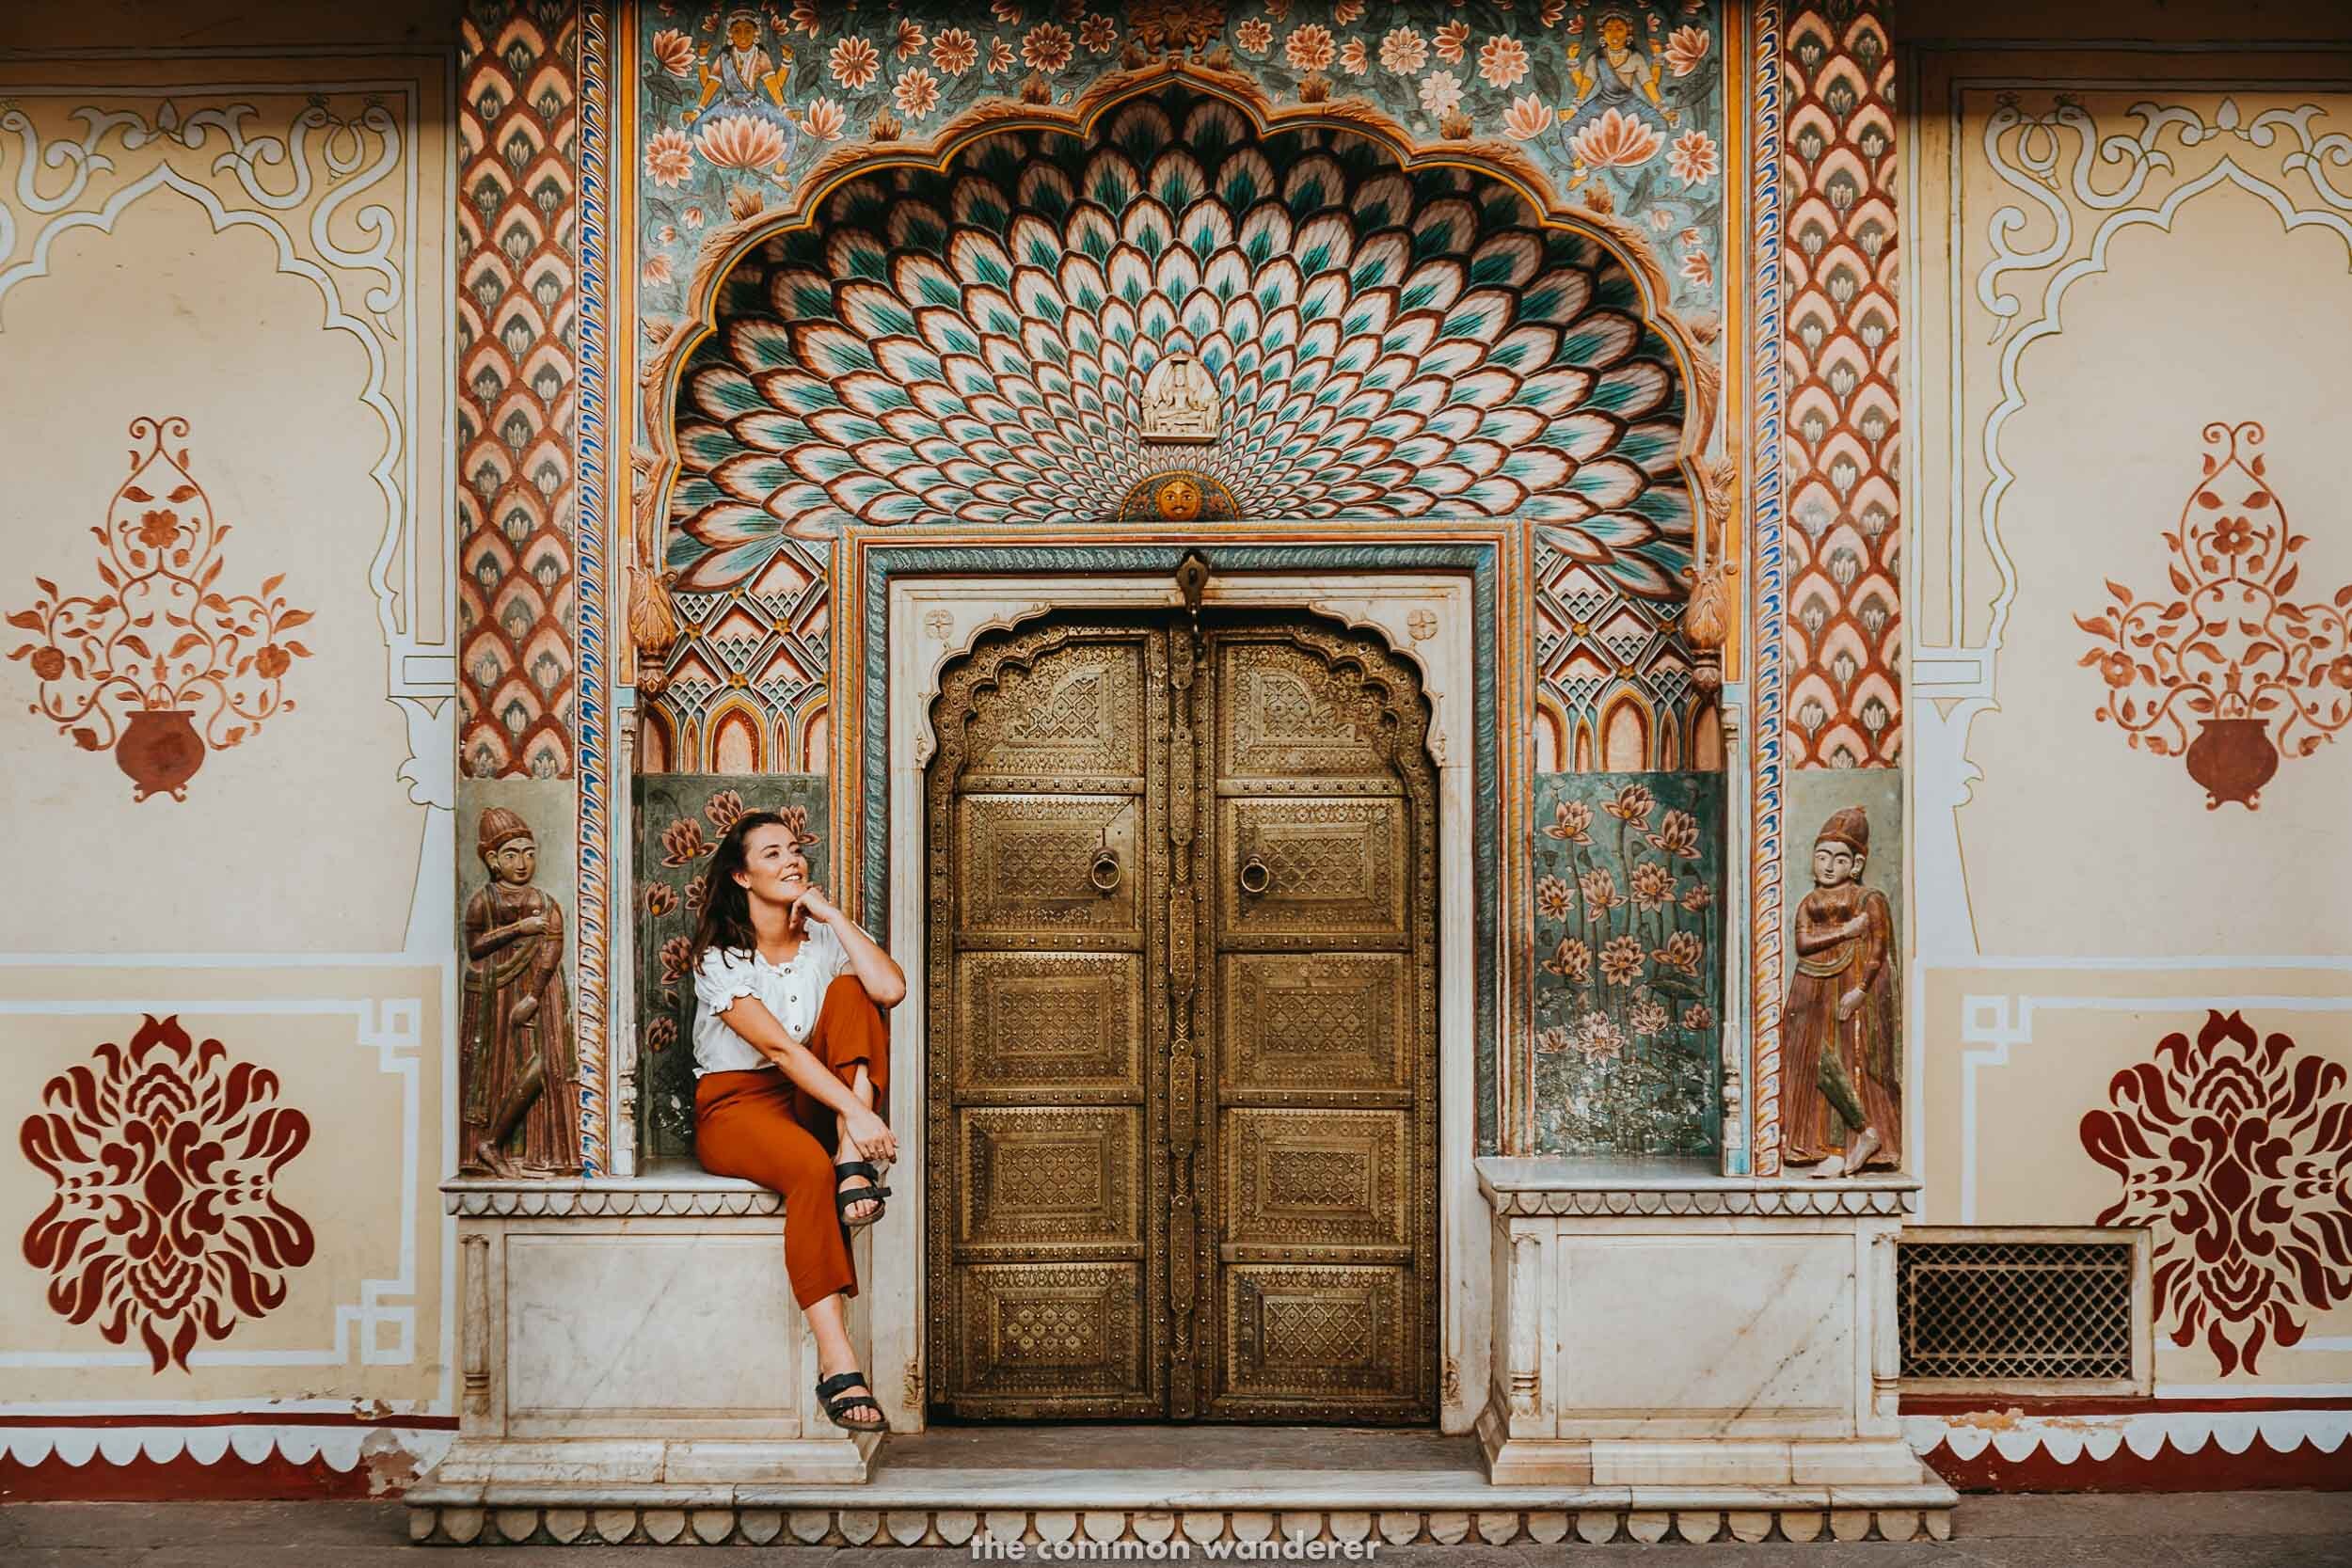
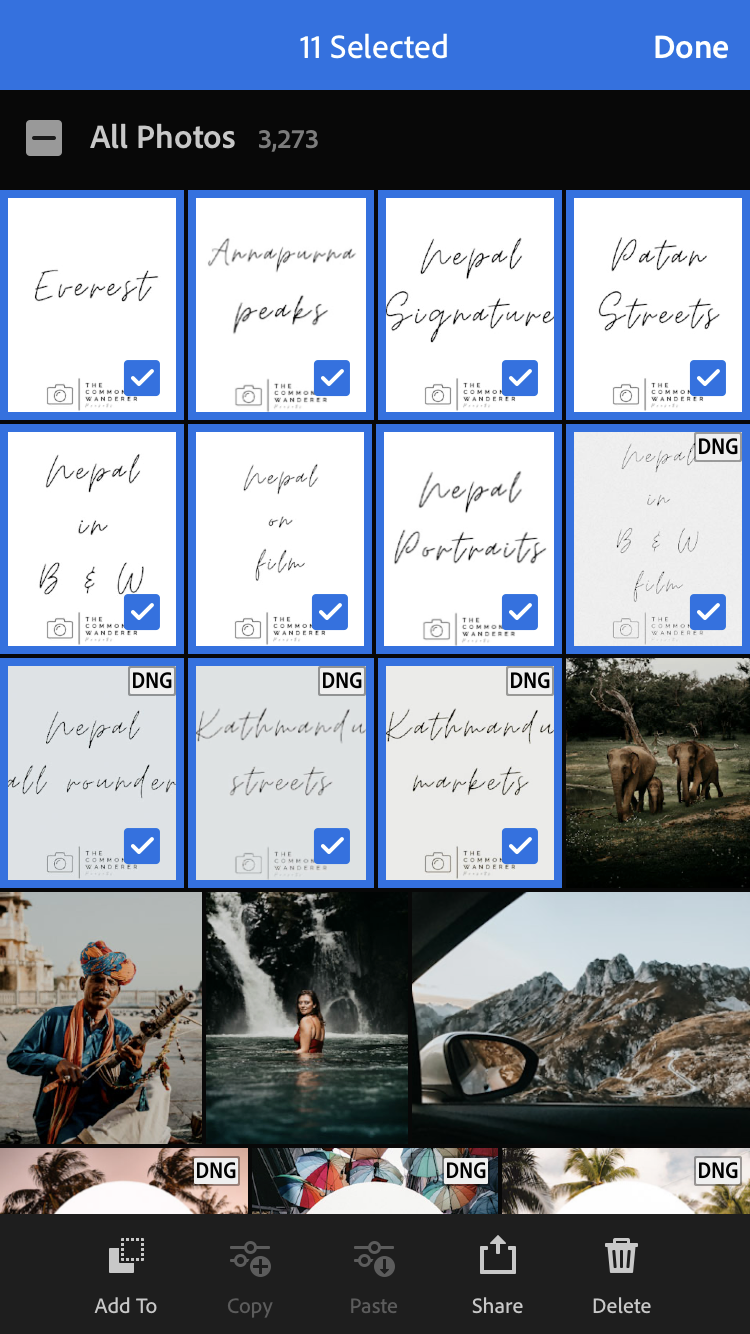
For the sake of this tutorial, we're importing the ’Nepal’ preset pack which consists of 11 presets. The amount of presets in your folder will depend on the pack you purchased.
GOOGLE DRIVE (OUR PREFERRED METHOD)
To add your DNG presets to your mobile phone using Google Drive, follow the steps below:
Drag your DNG files into your Google Drive folder and wait for the files to sync
Once all your files are synced, go into the folder you set up your preset in on your Google Drive phone app and export each DNG file into your phone.
Save each preset individually to your camera roll
See detailed steps below in Step #3
NOTE | If you don’t have a desktop to unzip the preset pack, you can use apps like iZip to unzip the file directly on your phone.
STEP #3 | IMPORT THE PRESET FILES INTO THE LIGHTROOM APP
At this point you should have all of your DNG files saved to your phone.
DNG files have the preset applied to them, so you need to add these to Lightroom mobile and save the presets out of them.
If you go into your camera roll and see them as blank picture files, don’t be alarmed – that’s how they should look.
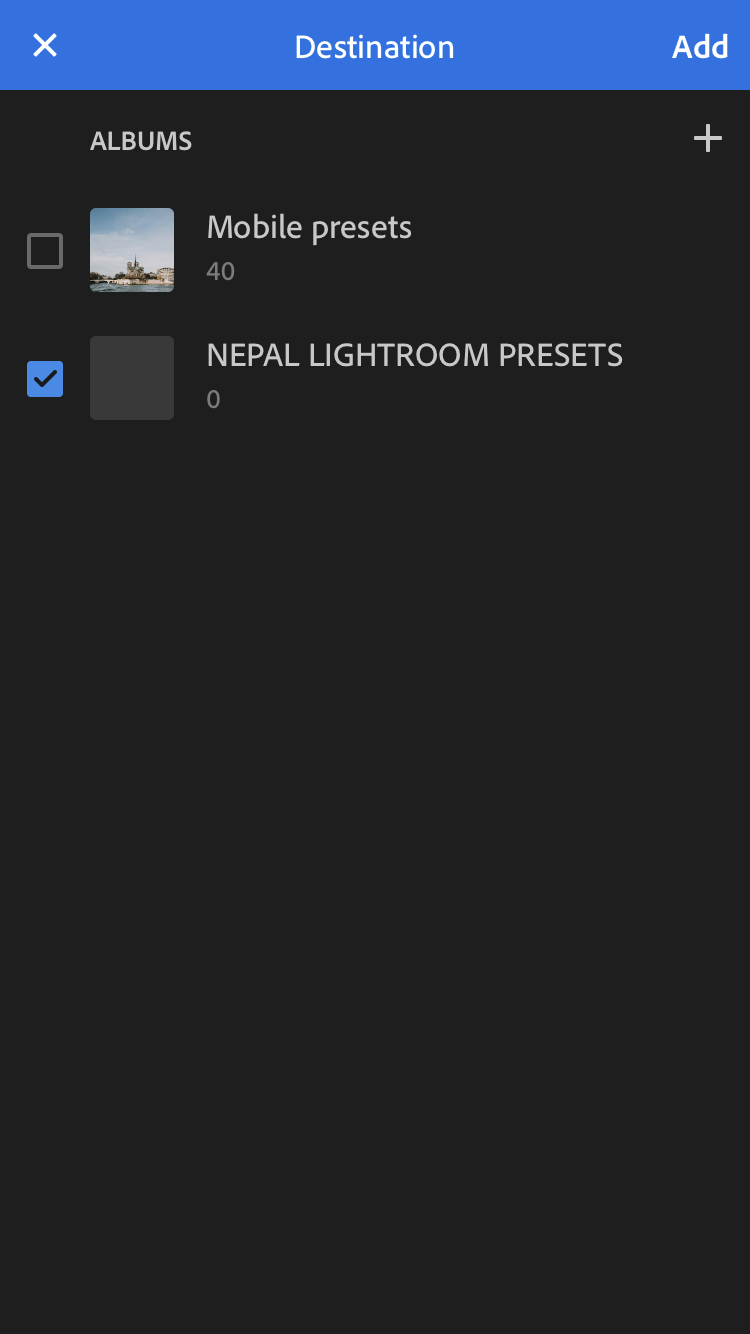
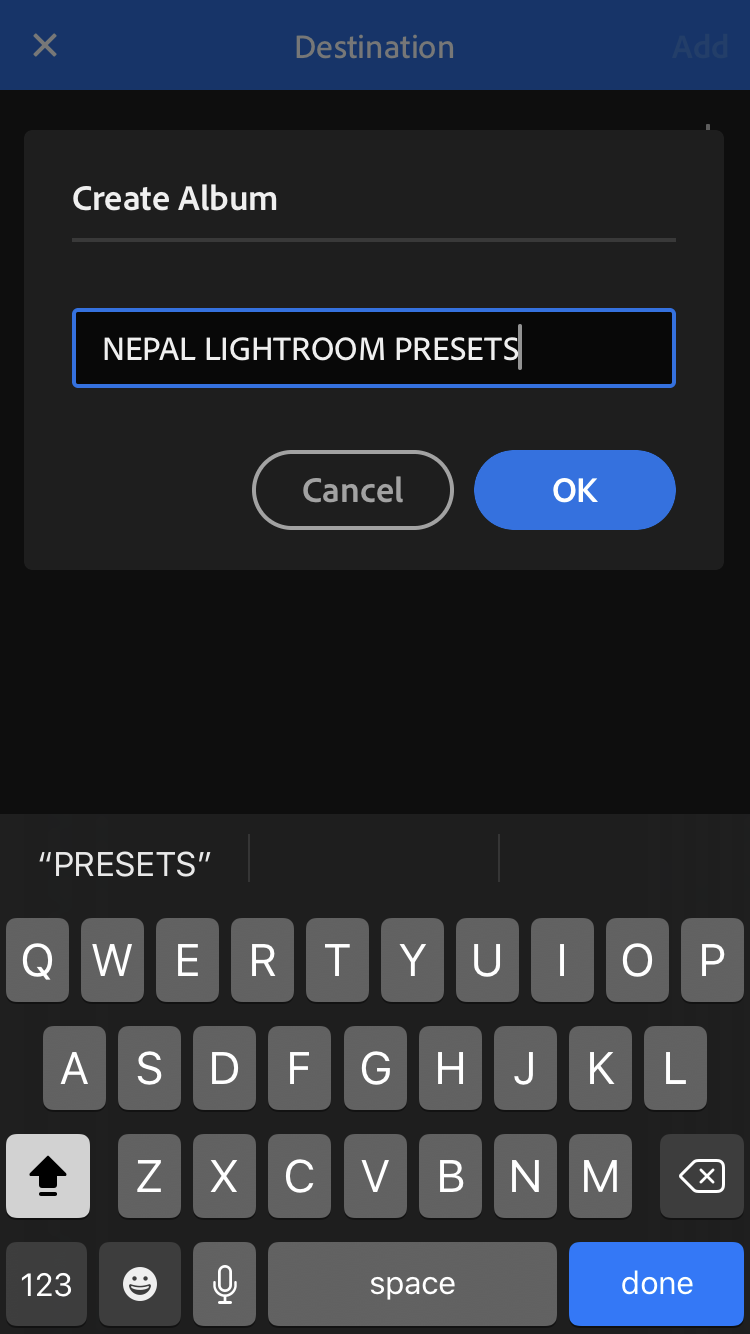
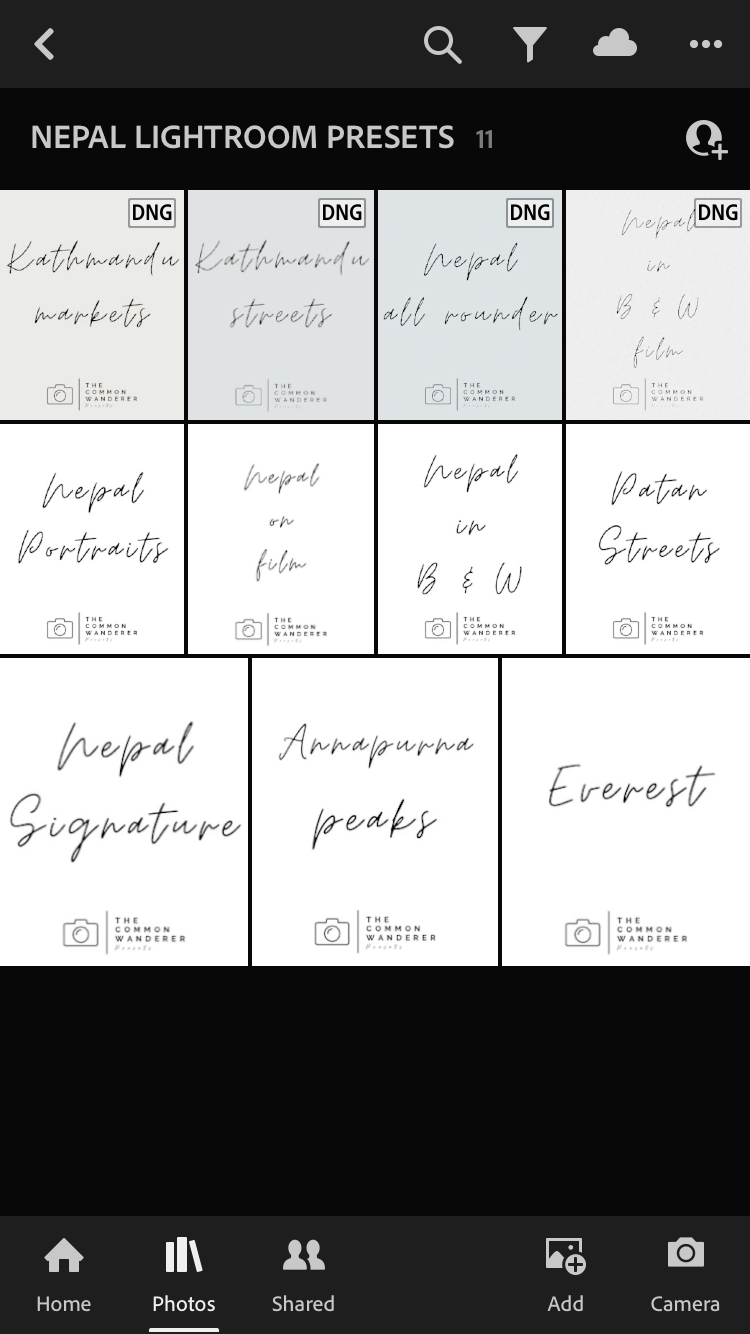
Open the Lightroom app and and select the DNG presets from your camera roll (or from iZIP) and import them into the newly created album in Lightroom.
In this case we’ll name it NEPAL Presets (or whatever preset pack you’ve downloaded):
STEP #4 | CREATE AND SAVE YOUR PRESETS
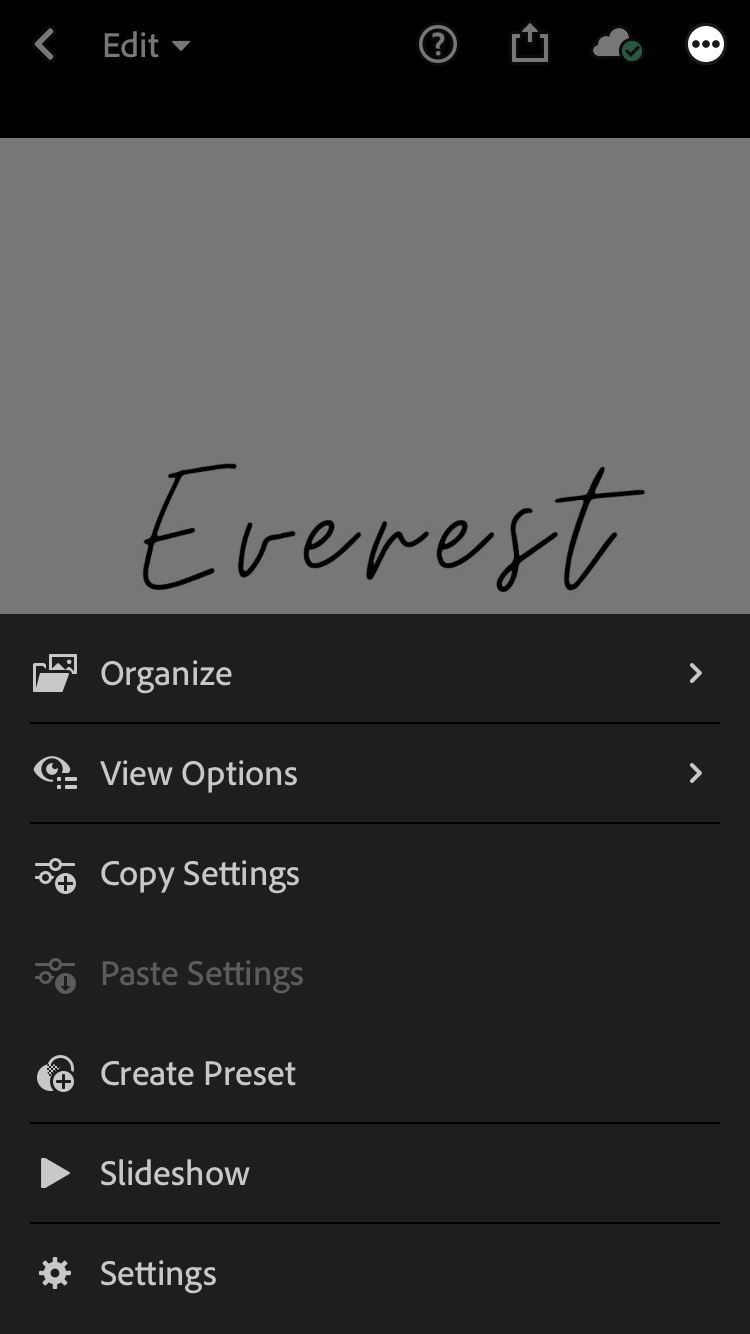
Go into the album containing your newly imported DNG files. Open the first file:
Now tap on the 3 dots icon at the top right of the screen and then tap on Create Preset:
Next you will see the New Preset screen (shown below) which contains all the options you can use to customise your preset.
You can give your preset a name, or use the preset names we’ve suggested (highly recommended) and add it into a Preset Group in Lightroom.
Create a new preset group (ie. TCW NEPAL Presets) - we recommend this if you have a lot of presets and want to keep them organised. Alternatively, if you’re not worried about grouping them together, you can also save them straight to your User Presets folders
The checkboxes below determine which picture settings you’d like to save with this preset. Only the settings you choose here will be applied to the pictures you edit with this preset in the future.
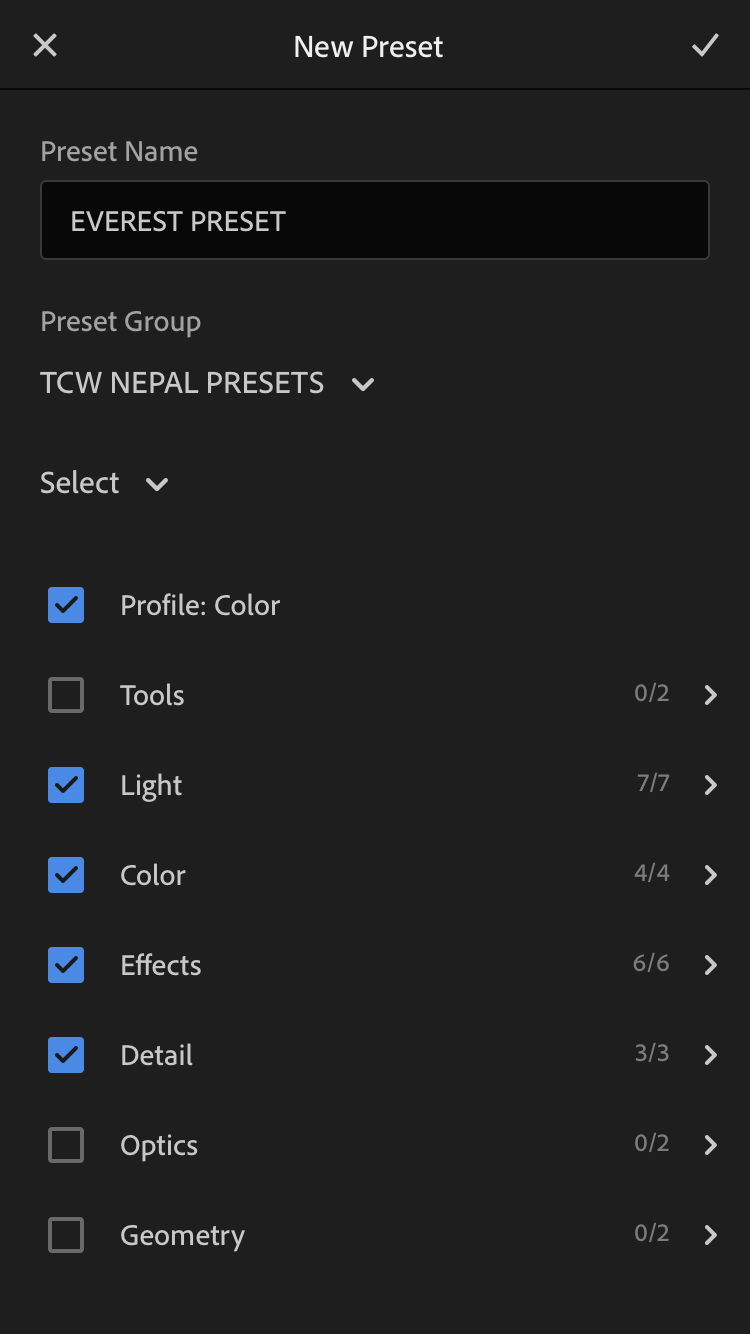
We personally check all boxes except for Tools, Optics and Geometry - these parameters vary from picture to picture so there's no need to transfer these across.
When you’re done with the settings save your preset by tapping on the tick icon at the top right corner.
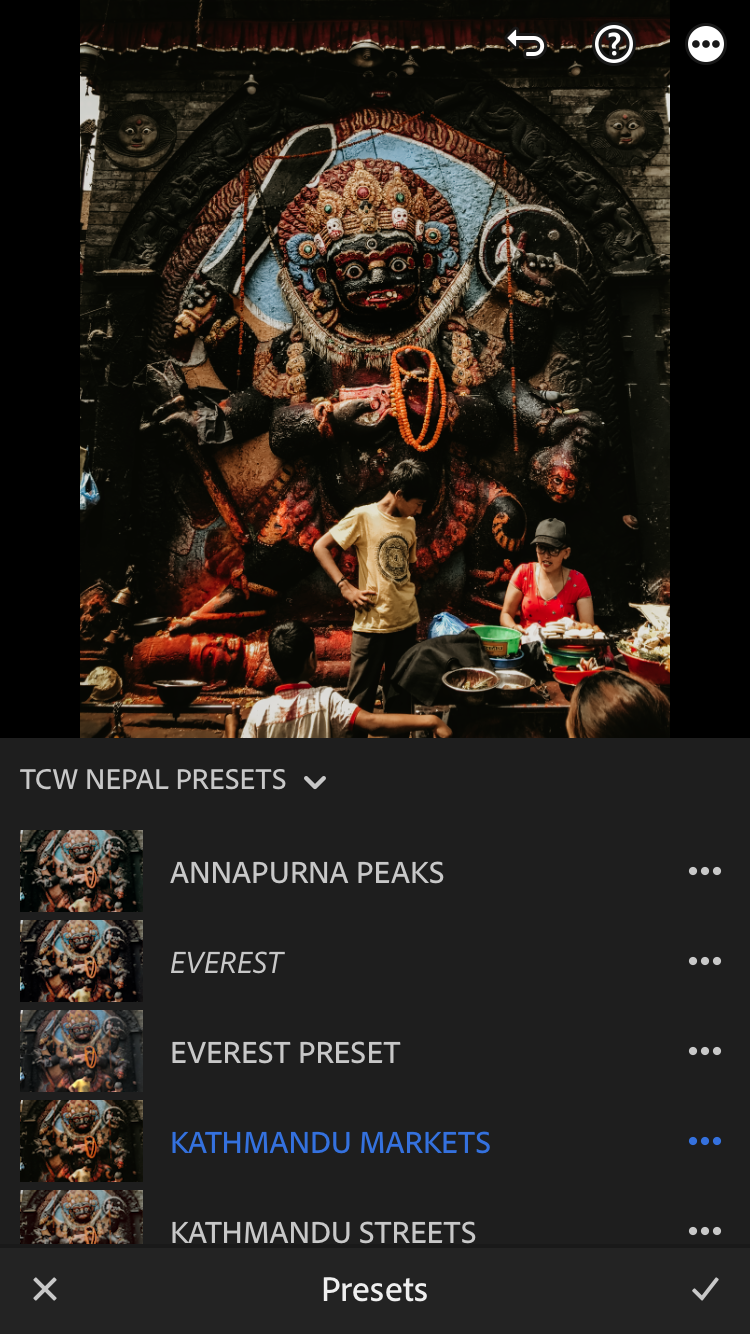
Repeat this step for each DNG file as you will need to save each preset separately.
When you’ve completed the actions for all presets, you’re done and ready to use your presets!
STEP #5 | USING YOUR NEW PRESETS
To use your new presets just go back into your library and open any photo you’d like to edit.
Find the Presets icon in the menu at the bottom of the screen and tap on it.
Make sure the Preset Group that’s selected is the one where you saved your new presets (ie. TCW NEPAL PRESETS).
If you saved them in the User Presets group, select that.
Now you can edit the photo by tapping on a preset from the list and then tapping on the checkmark.
You can still continue to edit the photo and make adjustments if you like (like exposure, white balance) after you’ve applied the preset.
LIGHTROOM MOBILE PRESETS EDITING TIPS
Please note that because every image is different, you'll most likely need to tweak basic settings after applying a filter such as brightness, temperature/white balance and colours etc.
We typically increase exposure, change the warmth, and then tweak the green/magenta tint until a photo looks correct.
If you find that the skin tones look too orange even after changing white balance, desaturate the orange within the HSL sliders.
You can do all this within the Lightroom app, adjusting settings until you're 100% happy with the result.
We're confident that our presets should require a minimal amount of editing to achieve our signature look though!
Once you're done, post to Instagram, Facebook or your IG stories!
We also highly recommend backing up all of the presets up on your laptop or external hard drive after downloading.
RELATED | How to edit using Lightroom